Contents
- Sign up for an Omeka account
- Create your new Omeka site
- You have a new Omeka site!
- An empty Omeka site
- Switch themes
- You have a new theme!
- Install some plugins
- Add an item to your archive
- Describe your new item
- A tricky question
- Attach a file to your item record
- You have an item!
- This is not the public page for your item.
- This is the public page for your item
- Create a collection
- Enter information about your collection
- Add items to your collection
- Choose the collection
- Check out your new collection
- Further Resources
Omeka.net makes it easy to create websites that show off collections of items.
Sign up for an Omeka account
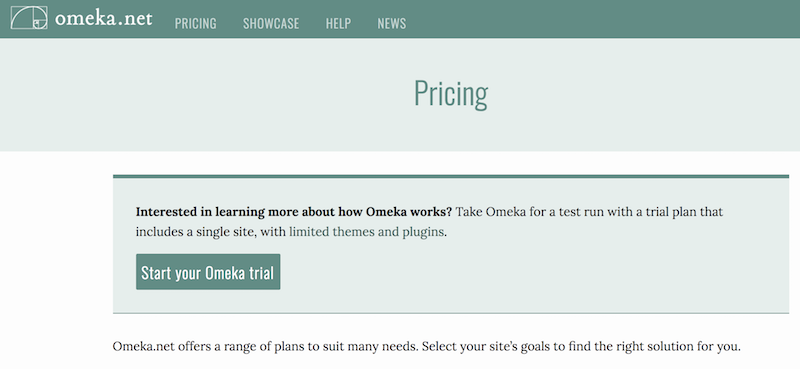
Sign up for a trial account
Go to www.omeka.net and click on Sign Up. Choose the Trial plan. Fill in the sign-up form. Check your email for the link to activate your account.
Create your new Omeka site
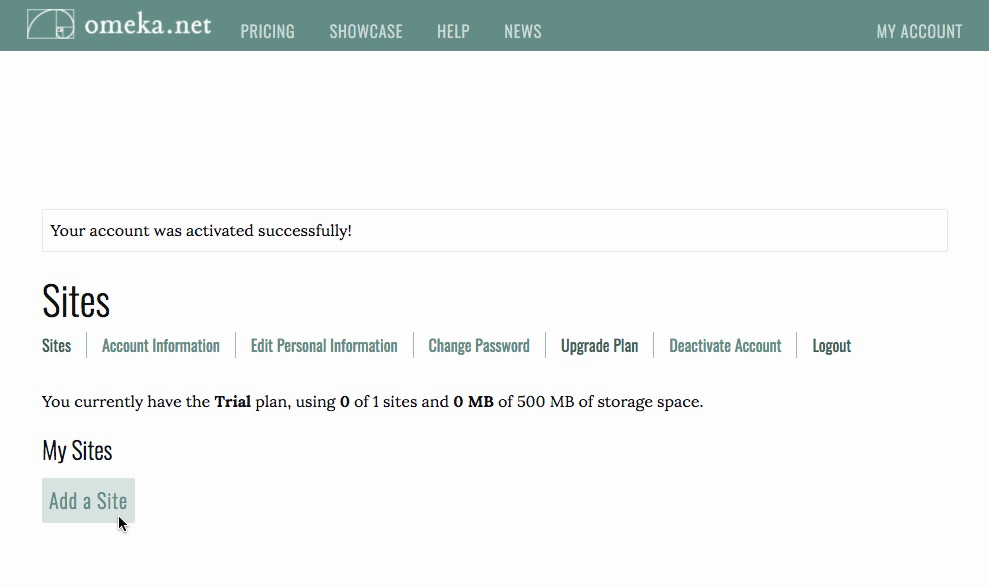
Omeka.net account page
After you’ve clicked on the link in your email, click on Add a Site.
Fill in information about your site’s URL, the title you want to use, and a description if you’d like. Click on Add Your Site.
You have a new Omeka site!
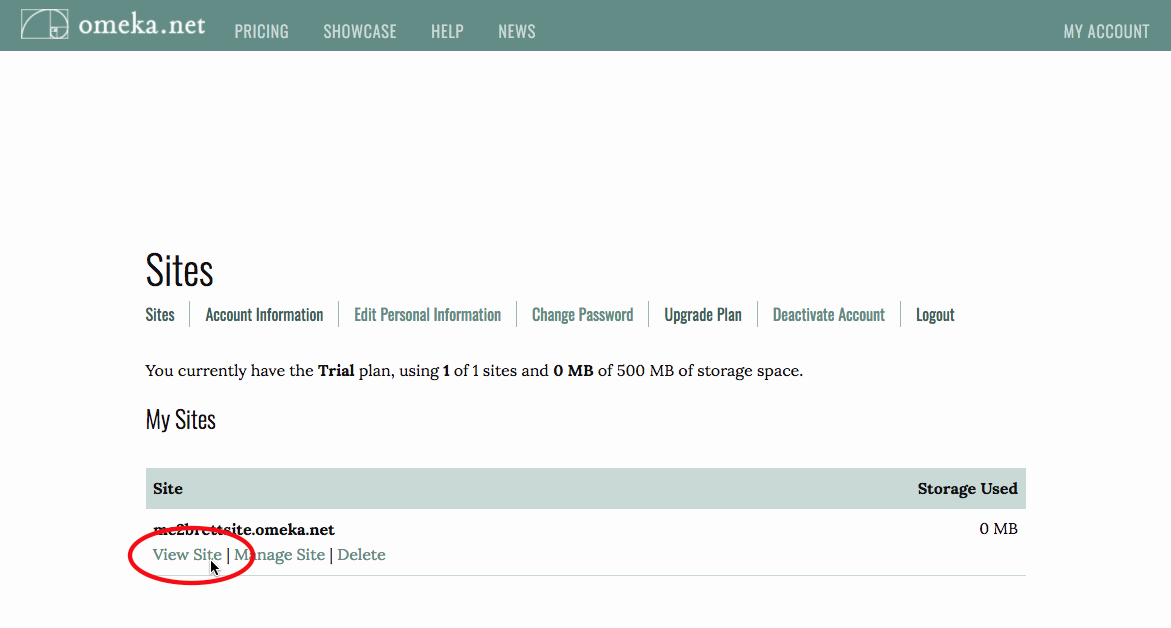
View your site
To see what it looks like, click on View Site.
An empty Omeka site
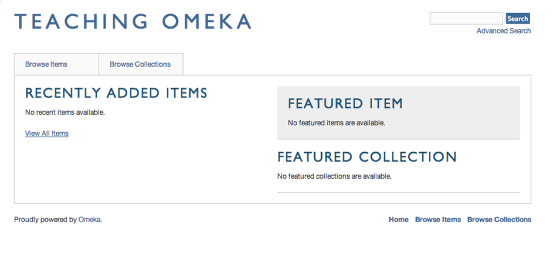
Public view
This is your empty Omeka site, waiting to be filled in. To get back to your dashboard, click the Back button or enter http://www.omeka.net/dashboard. This time, click on Manage Site.
Switch themes
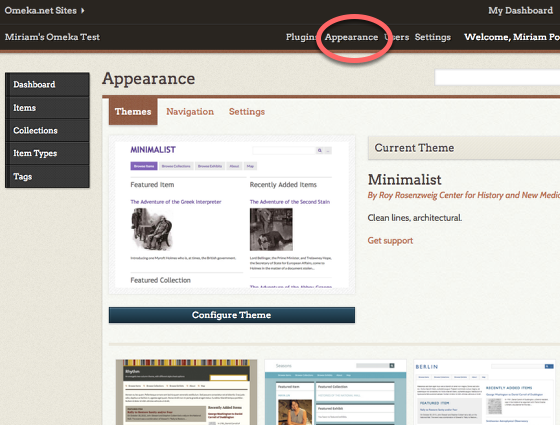
Theme settings page
Omeka allows you to change the look of your public-facing site by switching themes. To do this, click on Appearance (at the top right of your dashboard). Switch themes by selecting one of the options on the page. Press the green Use this theme button to activate your new theme. Then visit your public site by clicking on the name of your site at the top left of the page.
You have a new theme!
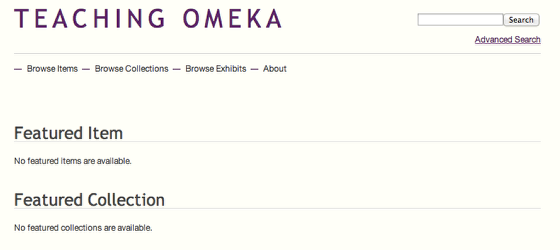
Public view with the new theme
Once you’ve checked out your new theme, head back to your dashboard. You can switch back to your old theme, stick with this one, or select one of the other options.
Install some plugins
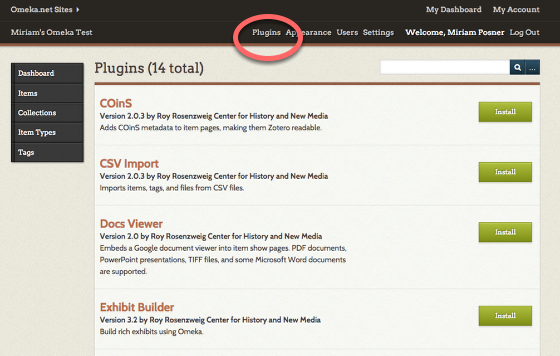
Plugins page
Your Omeka site comes with plugins, which offer some extra functionality. We need to enable them. To do that, click on the Plugins menu item at the top right. On the following page, click the Install button for Exhibit Builder (leave the options as they are on the page that follows) and Simple Pages.
Add an item to your archive
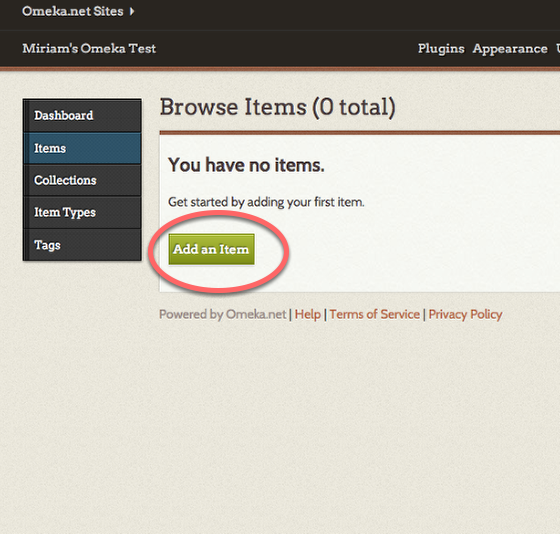
Add an item
Click on Items on the left-hand menu and then (naturally!) Add an item.
Describe your new item
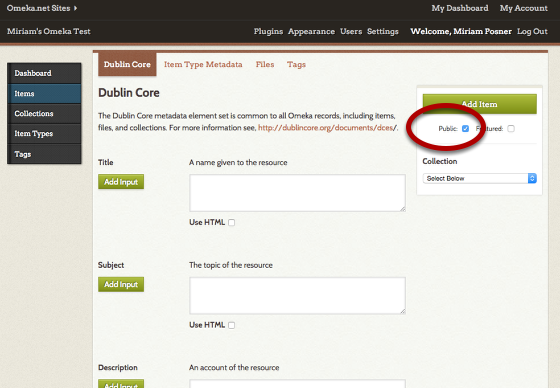
Make your item Public using checkbox circled here
Remember, Dublin Core refers to the descriptive information you’ll enter about your item. All of this information is optional, and you can’t really do it wrong. But try to be consistent.
Be sure to click the Public checkbox so that your item is viewable by the general public. If you don’t click that box, only people who are logged into your site will be able to see the item.
To add multiple fields — for example, if you want to add multiple subjects for your item — use the green Add input button to the left of the text boxes.
A tricky question

What is this?
I’m creating an item record for my dog, Bertie. But am I describing Bertie himself or a photograph of Bertie? If it’s the former, the Creator would be — well, I guess that depends on your religious outlook. If it’s the latter, the creator would be Brad Wallace, who took the photo.
The decision about whether you’re describing the object or the representation of the object is up to you. But once you’ve decided, be consistent.
Attach a file to your item record
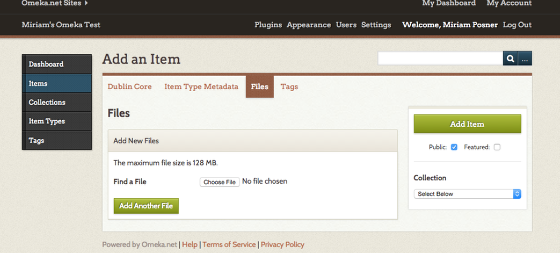
Adding files to an item
Once you’ve finished adding Dublin Core metadata, you can attach a file to your item record by clicking Files at the top of the Dublin Core form. (You don’t have to click Add Item before you do this; Omeka will automatically save your information.) You can add multiple files, but be aware that the Basic plan only comes with 500 MB of storage space.
Once you’ve added a file or files, you can add Tags by clicking on the button. You can also click on Item Type Metadata to choose the kind of thing — person, place, animal, vegetable, mineral — your item is. If you don’t see the appropriate item type for your item, don’t worry. We can add a new item type later.
When you’re all done, click the green Add Item button.
You have an item!
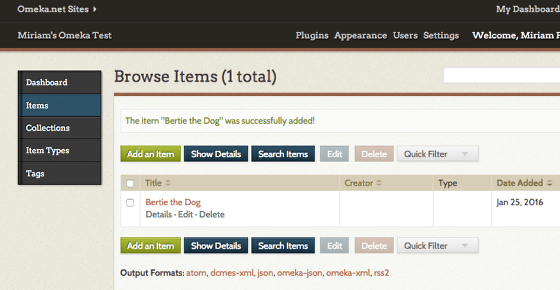
Browse Items, Admin view
This list contains all the items you’ve added. If the item were not public, it would have (Private) after the title. To see what the page for your new item looks like, click on the name of the item.
This is not the public page for your item.
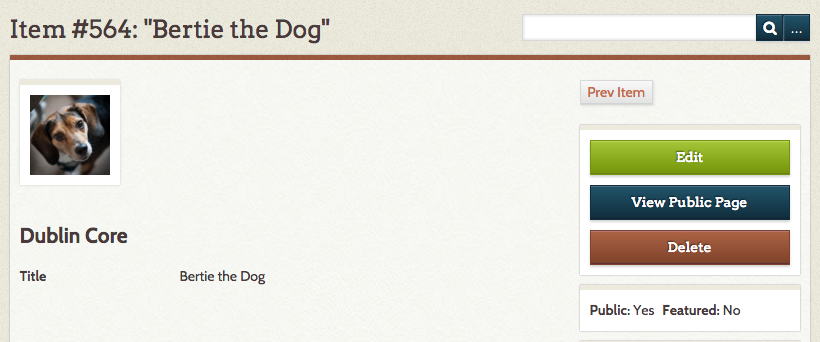
Item show, admin view
It may look like it, but this page isn’t what a non-logged-in user will see when she navigates to the page for your item. To see what a user would see, click on the blue View Public Page button on the right. (Or you can edit the item by clicking on Edit this item at the top right.)
This is the public page for your item

Item show, public view
This is what a general user will see if she navigates to your page.
Create a collection

Add a Collection
You can begin to bring order to your list of items by grouping them together in collections. To do this, return to your dashboard, click on the Collections tab, and click on Add a Collection.
Enter information about your collection
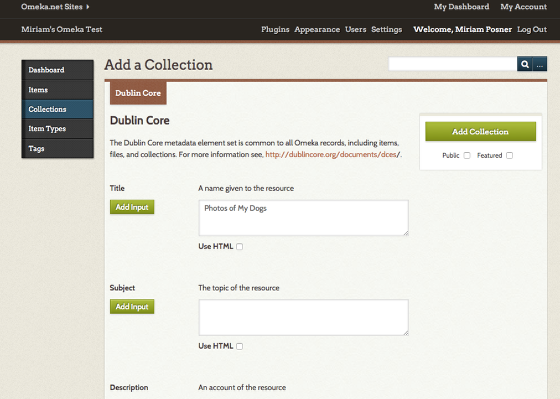
Add collection metadata
In Omeka, metadata is king! Enter some information about your new collection, and remember to click on the Public button near the bottom of the page. Then save your collection.
Add items to your collection
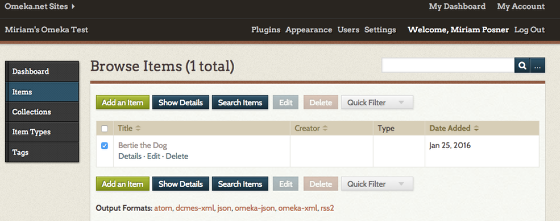
Click the item checkbox to batch edit
To fill up the collection you just created, click on the Items tab. From your Browse Items list, click the boxes of the items that belong in your new collection. Then click on the Edit button.
Choose the collection
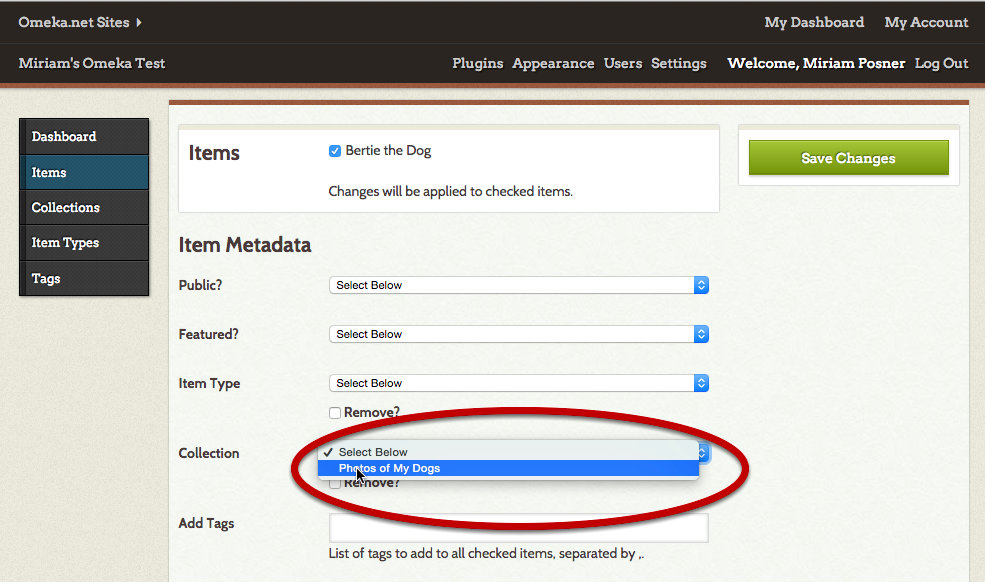
Select a collection from the dropdown
On the Batch Edit Items page, select the Collection you’d like to add your items to. (Also, take note of all the other things you can do on this page.)
Check out your new collection
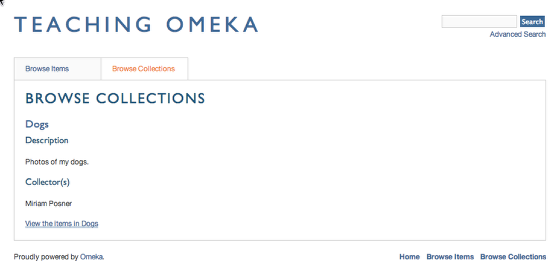
Browse collections, public view
Return to your public site. If you click on the Browse Collections tab on the public-facing site, you should now have a new collection containing the items you identified.
Now that you’ve added some items and grouped them into a collection, take some time to play with your site. It’s beginning to take shape now that you have both individual items and thematic units. But Omeka can do even more. We’ll talk about that in the next lesson.
Further Resources
The Omeka team has put together great resources on the software’s help pages